 Save
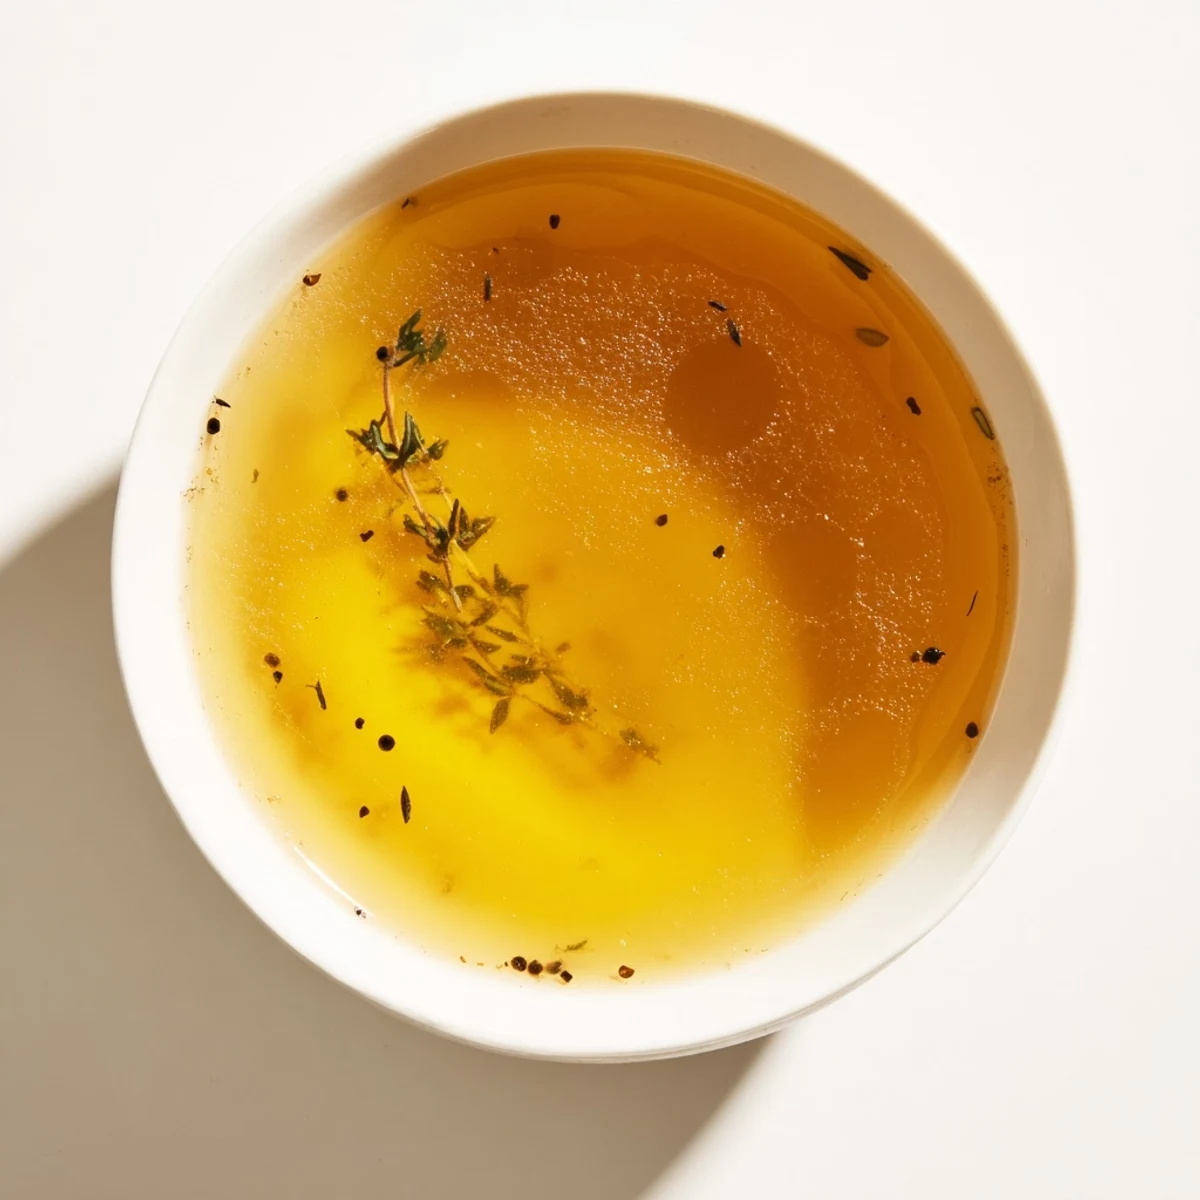
Save Transform simple beef bones into a deeply flavorful and nourishing broth by slow simmering with aromatic vegetables and herbs. Roasting the bones first enhances richness, while a long simmer extracts collagen and nutrients, resulting in a versatile base for soups, stews, or a warm, comforting drink. Carefully skim impurities and season towards the end to balance flavors. Store chilled and enjoy the natural depth from slow cooking.
I still remember the first time I made beef bone broth from scratch. My grandmother had always sworn by it, but I'd never bothered to try until a cold winter when I wanted something deeply nourishing to warm my bones. I roasted those bones until they were mahogany brown, filled my kitchen with the most incredible savory aroma, and let them simmer through the night. By morning, I had liquid gold—rich, silky, and worth every hour of patience. That first sip changed how I think about cooking.
I made this broth for my sister during her recovery from surgery, and watching her eyes light up when she realized what that golden liquid in the mug was—that's when I understood this recipe is about more than nutrition. It's about showing someone you care enough to spend twelve hours tending a pot for them.
Ingredients
- Beef bones (2.5 kg or 5.5 lbs): Use a mix of marrow bones for richness, knuckle bones for gelatin, and oxtail for depth. The variety matters because each bone contributes something different. Don't be shy about asking your butcher for bones—they're often happy to set them aside, and they're incredibly affordable.
- Carrots (2 large): Scrubbed and chunked, these add subtle sweetness and color. Keep the skin on because that's where much of the flavor lives, and it's what gives the broth its beautiful amber hue.
- Celery stalks (2): Cut into chunks. Celery is one of those quiet ingredients that nobody notices but everybody tastes—it rounds out the flavor in ways you can't quite put your finger on.
- Onion (1 large): Quartered with the papery skin still on. That charred, papery exterior is doing heavy lifting for your broth's color and depth. Don't peel it away.
- Garlic cloves (4): Smashed, not minced. When you smash them, they release their essence more gently into the long simmer, adding warmth without bitterness.
- Bay leaves (2): These delicate leaves whisper sophistication into the broth. Two is enough; more than that and you're overpowering the subtlety.
- Black peppercorns (1 tsp whole): Whole peppercorns stay in the background, adding a gentle peppery note that completes the flavor rather than shouting about it.
- Fresh thyme (4 sprigs) or dried (1 tsp): Thyme's earthiness anchors the broth and makes it feel like home. Fresh is lovely when you have it; dried works beautifully too.
- Fresh parsley (4 sprigs): These add a brightness that prevents the broth from feeling too heavy, even after twelve hours of simmering.
- Apple cider vinegar (1 tbsp): This is the secret that nobody talks about. The acidity helps draw minerals from the bones, making your broth more nutritionally dense. It's barely detectable in the final broth, but it's absolutely essential.
- Cold water (4 liters or 16 cups): Always start with cold water. This is the difference between a clear broth and a cloudy one—the cold water draws impurities out slowly as it heats, rather than sealing them in.
- Sea salt (1 tsp, plus more to taste): Add it in the last hour so it doesn't concentrate as the broth reduces. You want to taste the bones, not the salt.
Instructions
- Roast the bones until they're mahogany brown:
- Preheat your oven to 220°C (425°F) and spread the beef bones across a roasting pan in a single layer. This isn't a step to rush—roast them for 30 minutes, turning once halfway through. You're looking for deep, rich browning all over. This is caramelization, and it's where most of the broth's soul comes from. Take them out when they smell absolutely incredible and look like they've been kissed by fire.
- Build your flavor base:
- Transfer those caramelized bones to a large stockpot or slow cooker (if you're using a slow cooker, you have more flexibility later). Add the carrots, celery, onion, and garlic around the bones. They're going to become the backdrop for everything else.
- Cover everything with cold water:
- Pour in the 4 liters of cold water, making sure the bones are completely submerged. Add your apple cider vinegar—this is important, don't skip it. Then add the bay leaves, peppercorns, thyme, and parsley. The aromatics are now floating around, waiting to infuse the broth with their essence.
- Bring to a gentle boil and skim:
- Increase the heat to medium-high and watch as the pot gradually comes to a boil. As it heats, you'll see gray foam rising to the surface—these are impurities, and they're trying to cloud your broth. Use a spoon or ladle to gently skim them off. It's meditative work, and it makes the difference between a crystal-clear broth and a murky one.
- Settle into the long simmer:
- Once you've skimmed off the impurities, reduce the heat to low. You want barely a whisper of a simmer—just a gentle bubble breaking the surface every few seconds. Cover the pot if you want to, or leave it slightly uncovered. Let it go for 12 hours. Yes, twelve hours. This is when all the magic happens. Check in occasionally to make sure the bones stay covered with liquid, adding more water if needed.
- Season in the final hour:
- As you approach hour 11, taste a small spoonful of broth. It should taste rich and deep. Season with sea salt to your preference in that final hour. Don't salt earlier—as water reduces, salt concentrates, and you don't want surprises.
- Strain and cool:
- Pour the entire pot through a fine-mesh sieve into a clean container, letting the broth drip through slowly. The solids—the bones, vegetables, everything—goes into the compost or trash. You're left with pure, golden liquid. Let it cool completely at room temperature, then refrigerate it overnight.
- Deal with the fat layer:
- Once chilled, a layer of solid fat will form on top. You can leave it there (it protects the broth and adds flavor) or skim it off if you prefer a leaner broth. Both are right.
 Save
Save My partner came home one evening while the broth was simmering and just stood there breathing in the smell, eyes closed. That's when I knew I'd made something worth the effort—something that goes beyond nutrition and becomes an experience, a comfort, a small act of love simmering on the stove.
How to Use Your Broth
This broth is endlessly versatile. Use it as the foundation for soups—vegetable, chicken noodle, beef stew—where it becomes the star ingredient that makes everything taste restaurant-quality. Pour it into risottos for creaminess without cream. Use it to cook grains like quinoa or rice, transforming them into something with actual flavor. On cold mornings, warm a mug of plain broth, maybe with a pinch of sea salt and a crack of pepper, and let it be your breakfast. Some days I add a spoonful of miso or a splash of soy sauce for umami depth, though that means it's no longer gluten-free. The broth adapts to what you need it to be.
Storage and Keeping
Refrigerated in an airtight container, this broth keeps for about five days. But honestly, I usually freeze it, which is where it becomes most valuable. Pour it into ice cube trays so you have individual portions—these frozen cubes are golden when you need a quick flavor boost in the middle of cooking. Larger portions can go into freezer bags, laid flat so they stack like files in your freezer. Frozen broth keeps for about three months, though I've never had any last that long because I use it constantly.
Deepening Your Broth
After you've made this basic version a few times, you'll start understanding how to customize it. Some people add kombu seaweed for iodine and umami. Others throw in dried mushrooms or a piece of ginger. I've experimented with adding chicken feet for extra collagen, and the results were noticeably more gelatinous and nourishing. The beauty of broth-making is that it teaches you to listen to what your body needs and trust your instincts.
- For extra collagen and a silkier mouthfeel, include some joint bones or chicken feet alongside your beef bones
- Leaving the broth to simmer for 24 hours instead of 12 creates an even richer, more concentrated flavor and deeper mineral content
- Always taste your broth as it's cooling and adjust seasoning—what tastes right hot might need tweaking once it's chilled
 Save
Save Making bone broth taught me that good cooking isn't about speed—it's about patience and showing up. Every time you make this, you're not just creating a nutritious liquid; you're connecting yourself to centuries of cooking tradition and nourishing everyone who tastes it.
Recipe FAQs
- → What types of bones work best for this broth?
-
Marrow, knuckle bones, oxtail, or a mix provide rich collagen and deep flavor essential for a nutrient-dense broth.
- → Why roast the bones before simmering?
-
Roasting caramelizes the bones, enhancing depth and color, which enriches the overall flavor of the broth.
- → How long should the broth simmer for optimal flavor?
-
Simmering 12 hours extracts maximum nutrients and flavor. Extending to 24 hours can deepen richness, but monitor water levels.
- → Can I adjust seasoning during cooking?
-
It's best to season lightly at the end with salt to control flavor balance without concentrating saltiness during reduction.
- → What is the best way to store the broth?
-
After straining and cooling, refrigerate up to 5 days or freeze for longer; remove solid fat layer if desired before use.
