 Save
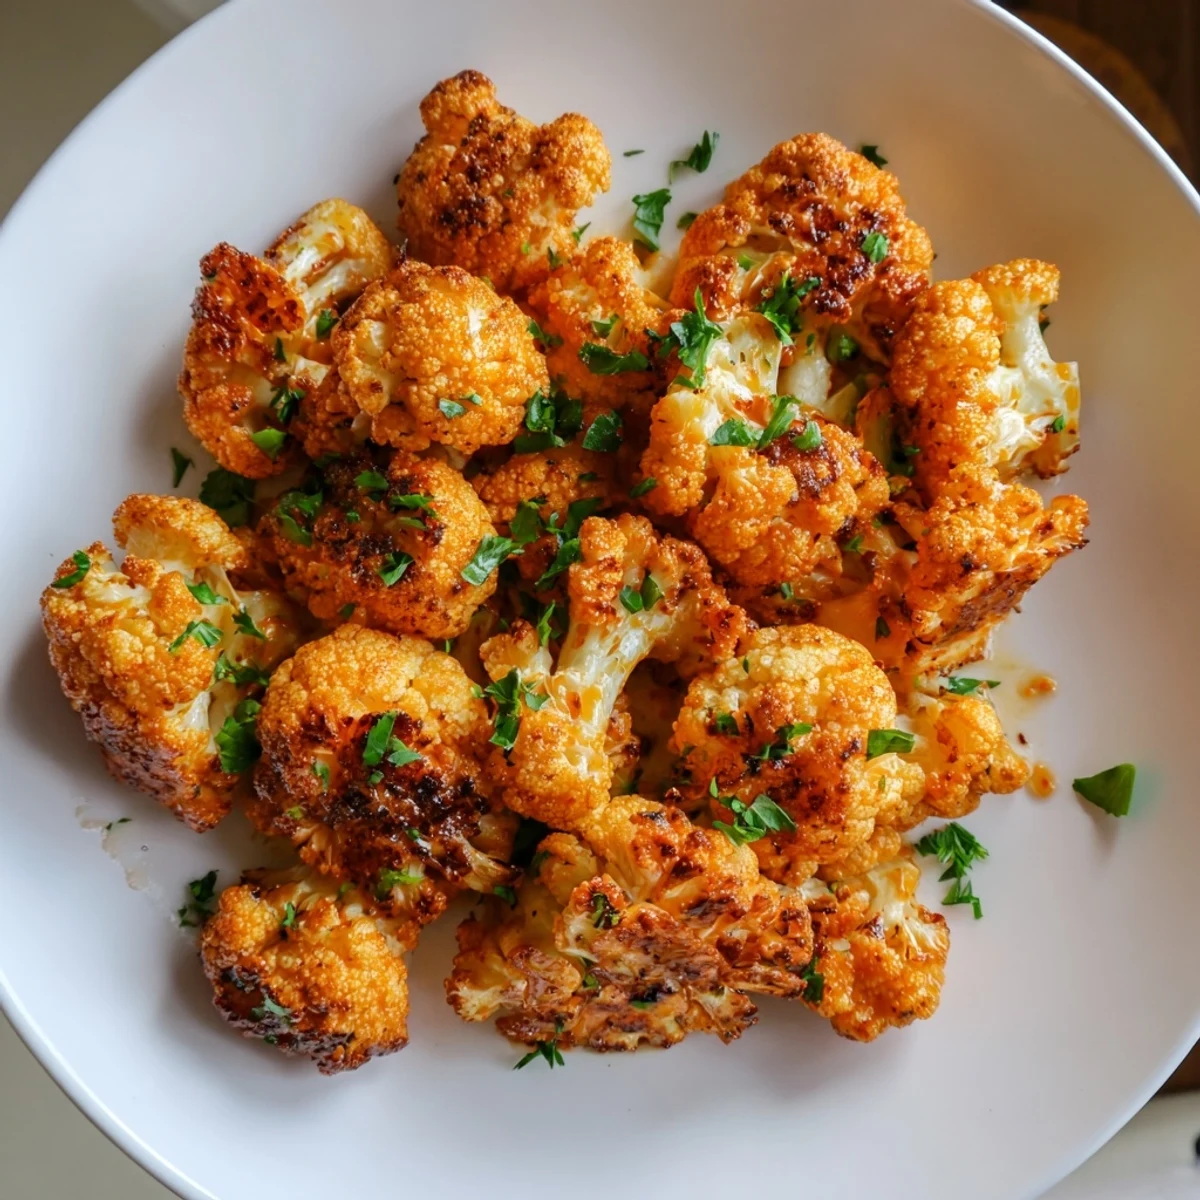
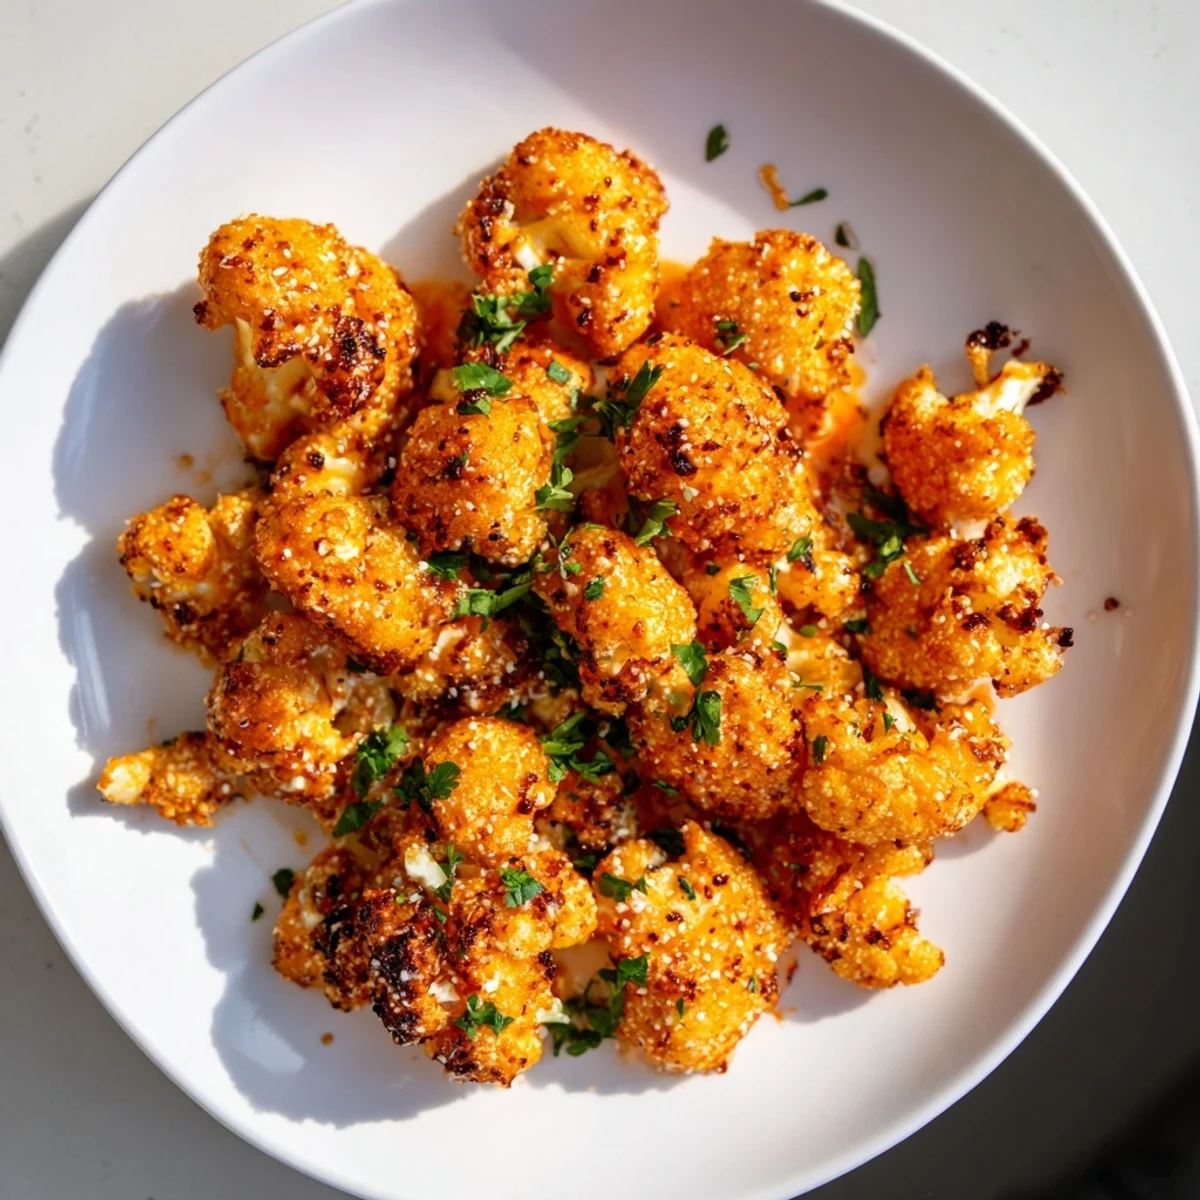
Save This dish features bite-sized cauliflower florets baked to a crispy golden finish. A seasoned batter enhances texture before being tossed in a bold, tangy buffalo sauce made from hot sauce, melted butter, and a touch of sweetness. A final bake crisps the coating, creating a perfect balance of heat and crunch. Optional fresh herbs add brightness, making it a satisfying vegetarian treat suitable for various dietary preferences.
I still remember the first time I made buffalo cauliflower for a game day gathering. My meat-eating friends were skeptical until they bit into that crispy, spicy floret, and suddenly everyone was reaching for more. That night changed how I think about vegetarian appetizers—it proved that you don't need wings to deliver that addictive buffalo experience. Now whenever I roast a head of cauliflower in my oven, that same kitchen magic happens, and I'm transported back to their surprised faces.
I'll never forget making this for my sister during her first week of being vegetarian. She was worried about missing out on all her favorite finger foods, so I whipped up a batch of these to prove that plant-based eating could still be bold and spicy. The way her eyes lit up when she tasted them was worth every minute in the kitchen. Now it's become our tradition whenever family gathers around the TV.
Ingredients
- 1 large head cauliflower, cut into bite-sized florets: Choose one with tightly packed florets for better structural integrity during baking. I cut mine slightly larger than bite-size to account for some shrinkage, and I make sure each piece has some of that precious stem attached for texture contrast.
- 3/4 cup all-purpose flour: This is your crispiness foundation. If you're going gluten-free, swap it one-to-one with your preferred blend—I've had great luck with rice flour or a commercial gluten-free mix.
- 1/4 cup cornstarch: The secret to that ultra-crispy coating that stays crunchy even as it sits. This gives you texture that rivals any fried version.
- 1 teaspoon garlic powder: Essential for building savory depth in the batter itself, so every layer tastes intentional.
- 1 teaspoon onion powder: Works in tandem with garlic to create that umami base that makes people wonder what you're hiding in there.
- 1/2 teaspoon smoked paprika: Adds a subtle smokiness that hints at grilled or charred flavors, elevating the whole dish.
- 1/2 teaspoon salt and 1/4 teaspoon black pepper: Don't skip these—seasoning the batter itself is how you get flavor in every bite, not just on the outside.
- 3/4 cup milk: Dairy or plant-based both work beautifully. The milk creates the batter consistency, so you want something neutral that won't overpower.
- 1/2 cup hot sauce like Frank's RedHot: Frank's is my go-to because it has the perfect balance of heat and tangy vinegar without being overwhelming. That vinegar is crucial for cutting through the richness.
- 2 tablespoons unsalted butter, melted: This tempering agent mellows the sauce just enough and adds richness. Vegan butter works perfectly if you're keeping things plant-based.
- 1 tablespoon honey or maple syrup: Optional, but I always add it. Just a touch balances the heat with subtle sweetness, making people keep reaching for more instead of reaching for water.
- Chopped fresh parsley or chives for garnish: Not just decoration—the fresh herb brightens everything and adds that restaurant-quality finish that makes people think you fussed more than you did.
Instructions
- Get your oven ready and set up your workspace:
- Preheat your oven to 220°C (425°F) and line a large baking sheet with parchment paper or a silicone mat. This prevents sticking and lets you watch the bottoms get golden. I do this first so the oven is ready when the batter is, and you're not standing around with coated florets waiting.
- Build your batter foundation:
- In a large bowl, whisk together the flour, cornstarch, garlic powder, onion powder, paprika, salt, and black pepper. This step isn't just mixing—you're aerating the dry ingredients so the batter will be light and crispy. Gradually pour in the milk while whisking constantly, moving your whisk in slow circles to avoid lumps. You want a thick, smooth batter that clings to a spoon and looks almost creamy. If it seems too thick, add a splash more milk a tablespoon at a time.
- Coat those florets like you mean it:
- Add the cauliflower florets to your batter bowl and toss with a spatula or your hands, making sure every single piece gets an even, generous coating. This is where patience pays off—each floret should look like it's wearing a little batter jacket. Don't rush this step.
- Arrange and first bake:
- Spread the battered florets in a single layer on your prepared baking sheet, leaving a bit of space between each one so hot air can circulate. They should not be touching. Bake for 20 minutes, then flip them halfway through with a spatula. This helps them crisp on both sides and develop that golden color.
- Make your buffalo magic:
- While the cauliflower is baking, whisk together the hot sauce, melted butter, and honey or maple syrup in a small bowl. Taste it—if you like more heat, add a bit more hot sauce. If it's too spicy, add a touch more butter or sweetener. This is your moment to adjust to your crowd's preferences.
- Toss in the sauce:
- When the 20 minutes are up and your florets look golden and set, remove them from the oven. Carefully transfer them to your buffalo sauce bowl and toss thoroughly until every piece is coated in that spicy, buttery goodness. The heat from the florets will help the sauce cling better.
- Final crisping:
- Return the sauced florets to the baking sheet and bake for another 10–15 minutes. You're looking for crispy edges and light browning. The sauce will caramelize slightly on the edges, creating little flavor pockets. Don't skip this—it's what makes them irresistible.
- Finish and serve:
- Transfer everything to a serving platter, sprinkle with fresh parsley or chives if you have them, and serve immediately while they're at their crispiest. Serve alongside celery sticks and your choice of blue cheese or ranch dressing for dipping.
 Save
Save Last summer, I made this for my nephew's high school friends during a movie marathon, and watching that group of teenage boys demolish two full trays while debating whether they actually had cauliflower in their mouths felt like winning an unspoken culinary lottery. One of them asked for the recipe to make at home, which is probably the highest compliment any cook can receive. That's when I realized this dish had become my secret weapon for converting skeptics.
The Science Behind the Crispiness
The magic in this recipe comes from the combination of cornstarch and flour in the batter. Cornstarch absorbs moisture differently than flour, creating a protective barrier that stays dry and crispy even as the cauliflower releases steam. The high oven temperature causes the starch to gelatinize rapidly, forming a shell before any moisture has a chance to soften it. When you add the butter to the sauce, it doesn't just add flavor—it helps the sauce cling to the coating rather than sliding off or making things soggy. Understanding this means you can troubleshoot if something seems off, and it helps you understand why each step matters.
Customizing Your Heat Level
Buffalo sauce heat levels vary wildly depending on brand and personal preference. Frank's RedHot is moderate—hot enough to make you notice but not so much that it overpowers the flavor. If you're cooking for people with varying spice tolerances, I've learned to make the sauce slightly milder than you'd want, and let people add their own hot sauce at the table. I always keep a bottle nearby for people who want to amp things up. You can also cool things down by adding more honey or a splash of ranch dressing to the sauce itself, which mellows the heat beautifully. The goal is to create something that makes people say yes to a second piece, not something that requires milk chasers.
Making It Your Own
Once you understand the core technique, this recipe becomes a launching point for creativity. I've made versions with sriracha for an Asian-inspired kick, with barbecue sauce for a smokier vibe, and even with honey and cayenne for a spicy-sweet profile that's entirely different from traditional buffalo. The batter works beautifully as a base for any sauce-based coating you can dream up. The most important discovery I've made is that the batter-and-bake technique works for so many vegetables—broccoli, zucchini, even mushrooms all become crispy and crowd-pleasing. You're learning a technique that extends far beyond this single recipe.
- Try mixing your hot sauce with barbecue sauce for a sweet-spicy fusion that appeals to more palates.
- Experiment with different herbs in the garnish—cilantro for a fresh twist, or even a lime zest for brightness.
- Make the batter the night before and store it in the fridge; it actually works better after it's had time to hydrate.
 Save
Save This recipe has become my go-to proof that vegetarian food can be just as exciting and crave-worthy as anything else on the table. Whenever I make these, I'm reminded that the best meals happen when everyone—regardless of dietary choice—is reaching for the same platter and enjoying the same moment together.
Recipe FAQs
- → How do you make the cauliflower crispy when baking?
-
Coating the cauliflower in a thick batter and baking at a high temperature helps form a crispy exterior. Flipping halfway ensures even crispness. For extra crunch, broil for a few minutes at the end.
- → Can I use gluten-free flour in the batter?
-
Yes, substituting all-purpose flour with gluten-free flour works well and maintains the batter’s texture, making the dish gluten-free friendly.
- → What gives the buffalo sauce its spicy flavor?
-
The heat comes from hot sauce combined with melted butter, balancing spice with richness. Adding honey or maple syrup softens the heat and adds subtle sweetness.
- → Is it possible to make the dish vegan?
-
Absolutely. Replace the dairy milk with plant-based milk and use vegan butter instead of regular butter to keep the dish fully plant-based.
- → What are some suggested accompaniments for serving?
-
Serve with crunchy celery sticks and a creamy dressing such as blue cheese or ranch, or use vegan alternatives for dipping and complementing the heat.
- → How long does the preparation and cooking take?
-
Preparation typically takes about 15 minutes, with cooking time around 35 minutes, totaling approximately 50 minutes from start to finish.
