 Save
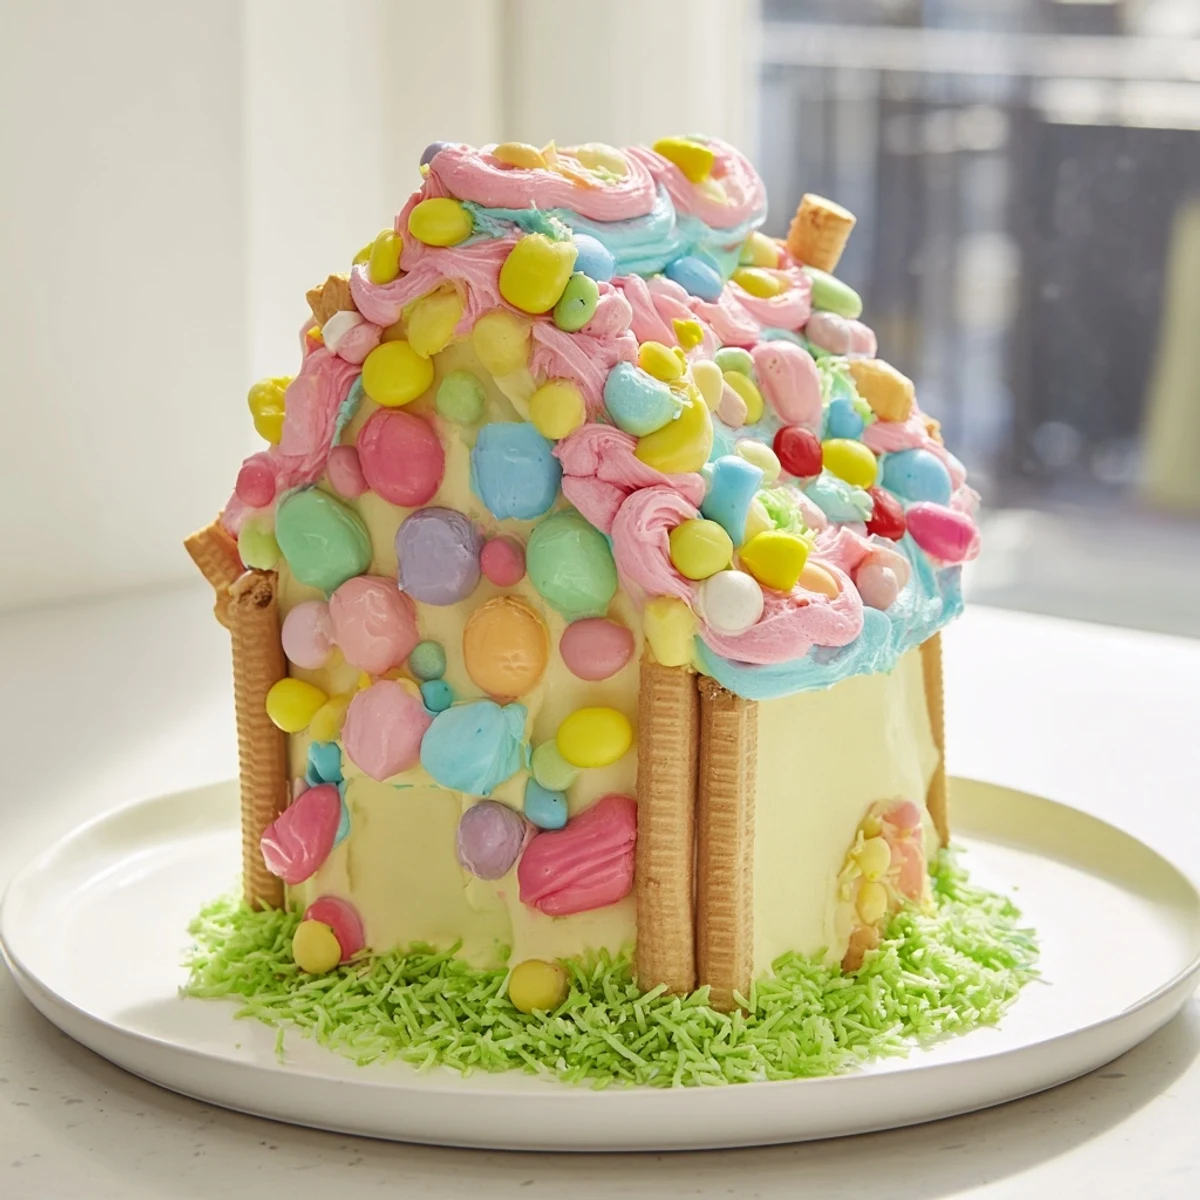
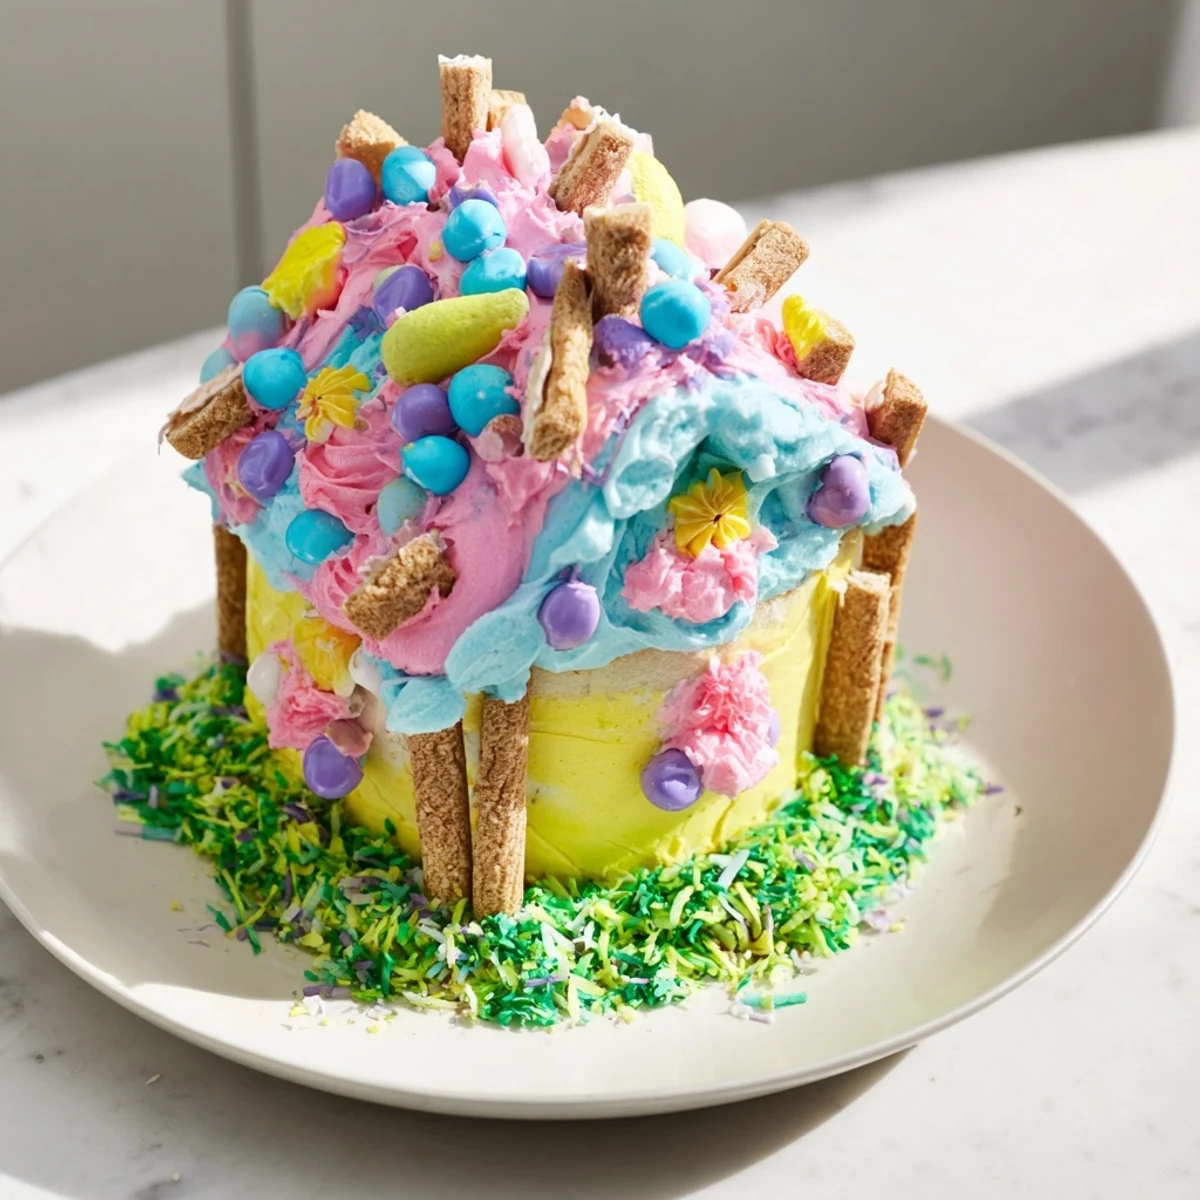
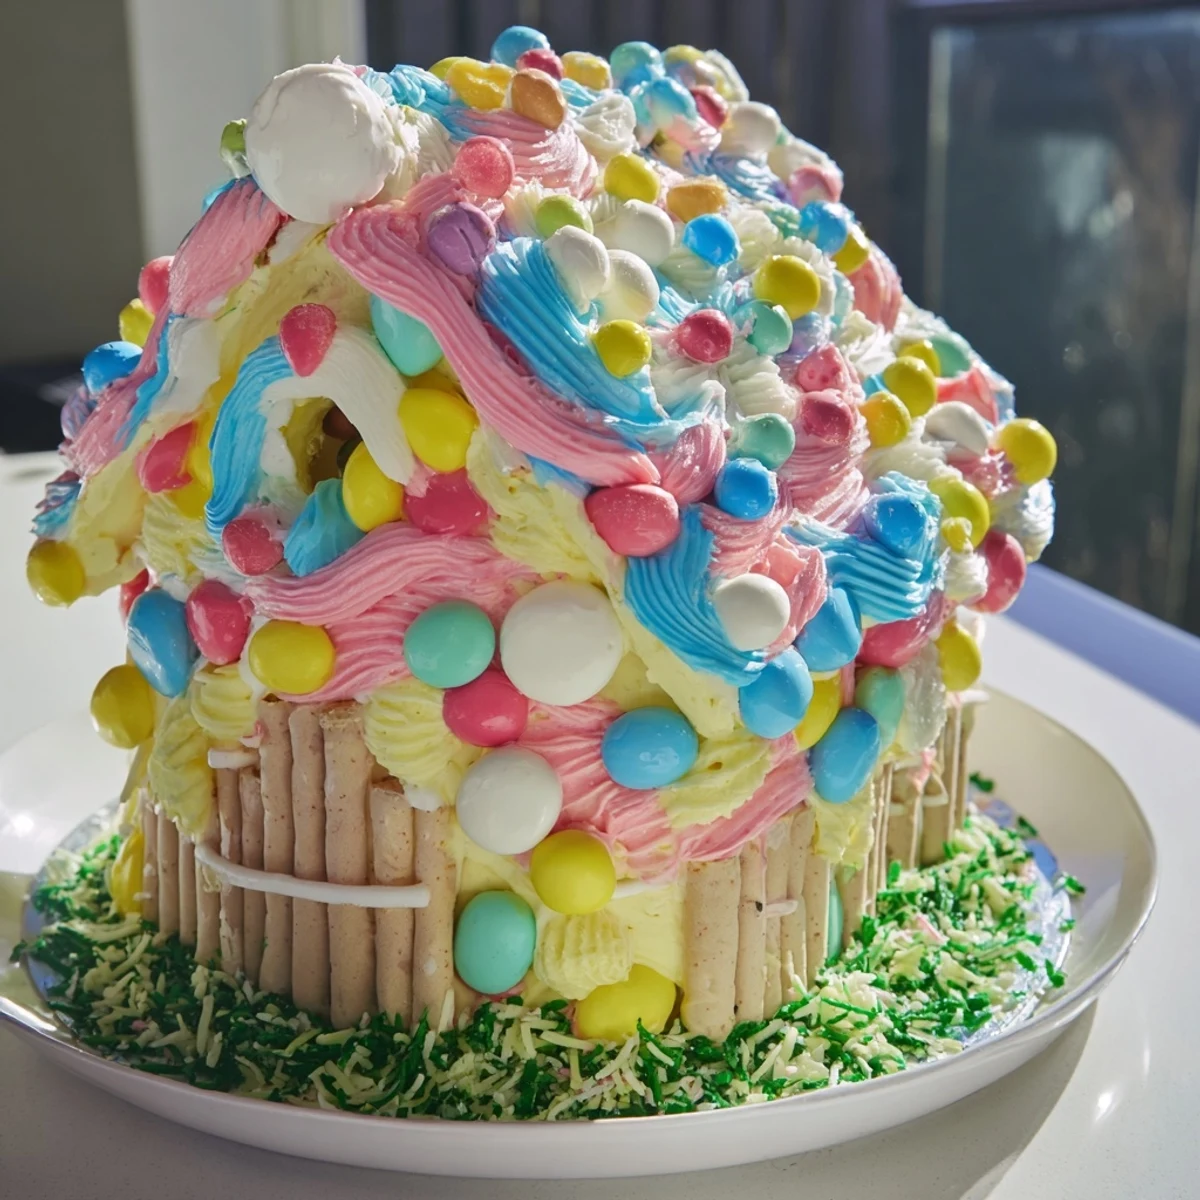
Save This vibrant cake brings a playful charm, combining a tender vanilla sponge with smooth, colorful buttercream. Crafted with candy details and shaped like a house, it offers a festive centerpiece perfect for celebrations. The textures blend soft cake and creamy frosting, enhanced with decorative touches like chocolate bits and dyed coconut for a lively finish. Preparing it involves baking, cooling, shaping, and frosting steps, making it an enjoyable project that yields a delightful, visually stunning dessert.
My daughter turned five on a rainy Saturday in April, and when she asked for a house cake instead of a princess tower, I panicked for about ten seconds before realizing I could just bake a sheet cake and cut it into shapes. The kitchen smelled like vanilla and butter all afternoon, and by the time I piped the last candy window onto the buttercream walls, she was standing on a chair beside me, eyes wide. That cake wasn't perfect, but it was ours, and she still talks about it.
I made this again for my nephew's birthday, and his mom told me he refused to let anyone cut into the roof for nearly an hour because he didn't want to ruin it. We all stood around the table, laughing, until he finally gave in and took the first slice himself. Watching kids protect a cake they're proud of is one of the sweetest things I've ever seen.
Ingredients
- All-purpose flour: The backbone of the sponge, giving it structure without weighing it down. Spoon it into your measuring cup and level it off so you don't end up with a dense crumb.
- Baking powder: This is what makes the cake rise tall and airy. Check the expiration date, because old baking powder will leave you with a flat, sad house.
- Unsalted butter: Room temperature is key. If it's too cold, it won't cream properly with the sugar, and if it's too soft, the batter won't hold enough air.
- Granulated sugar: Beaten with butter until pale and fluffy, this creates the light texture that makes every bite melt on your tongue.
- Eggs: Add them one at a time and let each one fully incorporate before adding the next. Rushing this step can make the batter look curdled.
- Vanilla extract: Pure vanilla adds warmth and depth. It's subtle, but you'd miss it if it weren't there.
- Whole milk: Keeps the cake moist and tender. I've tried it with lower-fat milk, and it just doesn't taste as rich.
- Powdered sugar: Sift it before adding to the buttercream, or you'll end up with gritty lumps no amount of beating will fix.
- Food coloring gels: Gels give you bold, saturated colors without thinning out the frosting. Liquid colors work, but you'll need a lot more.
- Candy-coated chocolates and wafer cookies: These turn frosting into architecture. Let your imagination run wild.
- Shredded coconut: Dye it green with a drop of gel color and a shake in a ziplock bag. It makes the cake look like it's sitting on a little lawn.
Instructions
- Prep the pan:
- Grease the 9x13-inch pan generously and line the bottom with parchment paper. This cake is too special to risk sticking.
- Mix the dry ingredients:
- Whisk the flour, baking powder, and salt together in a bowl. This ensures even distribution so you don't get pockets of raw flour or baking powder.
- Cream butter and sugar:
- Beat them together for a full three minutes until the mixture is light, fluffy, and nearly white. This step builds the cake's texture, so don't rush it.
- Add eggs and vanilla:
- Crack in one egg at a time, beating well after each. Then stir in the vanilla and watch the batter turn glossy and fragrant.
- Alternate dry and wet:
- Add the flour mixture in three parts, alternating with the milk, starting and ending with flour. Mix just until you can't see any streaks, then stop.
- Bake:
- Pour the batter into the pan, smooth the top, and bake for 30 to 35 minutes. The cake is done when a toothpick comes out clean and the edges pull away slightly from the sides.
- Cool completely:
- Let it cool in the pan for ten minutes, then turn it out onto a rack. Frosting a warm cake will melt your buttercream into a puddle.
- Make the buttercream:
- Beat the butter until creamy, then add powdered sugar gradually. Mix in vanilla and milk until it's smooth and spreadable, then divide and color it however you like.
- Cut and assemble:
- Slice the cooled cake into rectangles for walls and triangles for the roof. Arrange them on a board or platter to form a house shape.
- Frost and decorate:
- Spread colored buttercream over each section, then press candies, cookies, and coconut into the frosting. Work slowly and let each piece settle before adding the next.
- Chill before serving:
- Pop the finished cake in the fridge for 15 minutes to firm up the decorations. It'll be easier to slice and won't smudge when you carry it to the table.
 Save
Save The first time I made this, my son helped me place every single candy on the roof, one by one, while his little sister tried to sneak them into her mouth. By the time we were done, the kitchen was covered in powdered sugar and sprinkles, and the cake looked like a lopsided cottage from a fairy tale. But when we lit the candles and sang, he grinned so wide I thought his face would split. That's when I realized this cake wasn't about perfection, it was about the mess and the memory.
Decorating Ideas
You can make the house as simple or elaborate as you want. I've done versions with just a few candies pressed into white frosting, and I've done versions with piped shutters, a wafer stick fence, and a coconut lawn dotted with gummy flowers. Use what you have and what excites the birthday kid. Sometimes a handful of colorful chocolates is all you need to make a cake feel magical.
Flavor Variations
For a chocolate house, swap half a cup of the flour for unsweetened cocoa powder and keep everything else the same. The cake will be darker and richer, perfect for a gingerbread-style look. You can also add a teaspoon of almond extract to the batter for a subtle nutty sweetness that pairs beautifully with vanilla buttercream. I've even made a lemon version by replacing the vanilla with lemon zest and juice, and it tasted like sunshine.
Storage and Make-Ahead Tips
You can bake the cake a day ahead, wrap it tightly in plastic wrap, and store it at room temperature. The buttercream can be made up to three days in advance and kept in the fridge, just bring it back to room temperature and rewhip it before using. Once decorated, the cake will keep in the fridge for up to three days, though the candies may weep a little if it's humid.
- Cover the cake loosely with plastic wrap or a cake dome to protect the decorations without smudging them.
- If you're transporting it, chill it first so the buttercream firms up and the candies stay put.
- Leftover slices freeze beautifully for up to two months, just wrap them individually and thaw at room temperature.
 Save
Save This cake has become our family's go-to for birthdays, and every time I make it, someone asks for the recipe. I love that it's flexible, forgiving, and turns an ordinary afternoon into an edible celebration.
Recipe FAQs
- → How is the cake shaped to resemble a house?
-
The cake is cut into rectangles and triangles to form the base and roof, then assembled and frosted to create a house-like structure.
- → What ingredients add color to the buttercream?
-
Food coloring gels are incorporated into the vanilla buttercream to create vibrant and varied hues for decoration.
- → Can the cake flavor be modified easily?
-
Yes, substituting part of the flour with unsweetened cocoa powder offers a chocolate variation, maintaining the same structure.
- → What decorations enhance the house appearance?
-
Candy-coated chocolates mimic roof tiles and windows, wafer cookies form fences, and dyed coconut simulates grass.
- → How long does the preparation and baking take?
-
Preparation takes around 45 minutes, and baking about 35 minutes, totaling approximately 1 hour 20 minutes including cooling and decorating.
