 Save
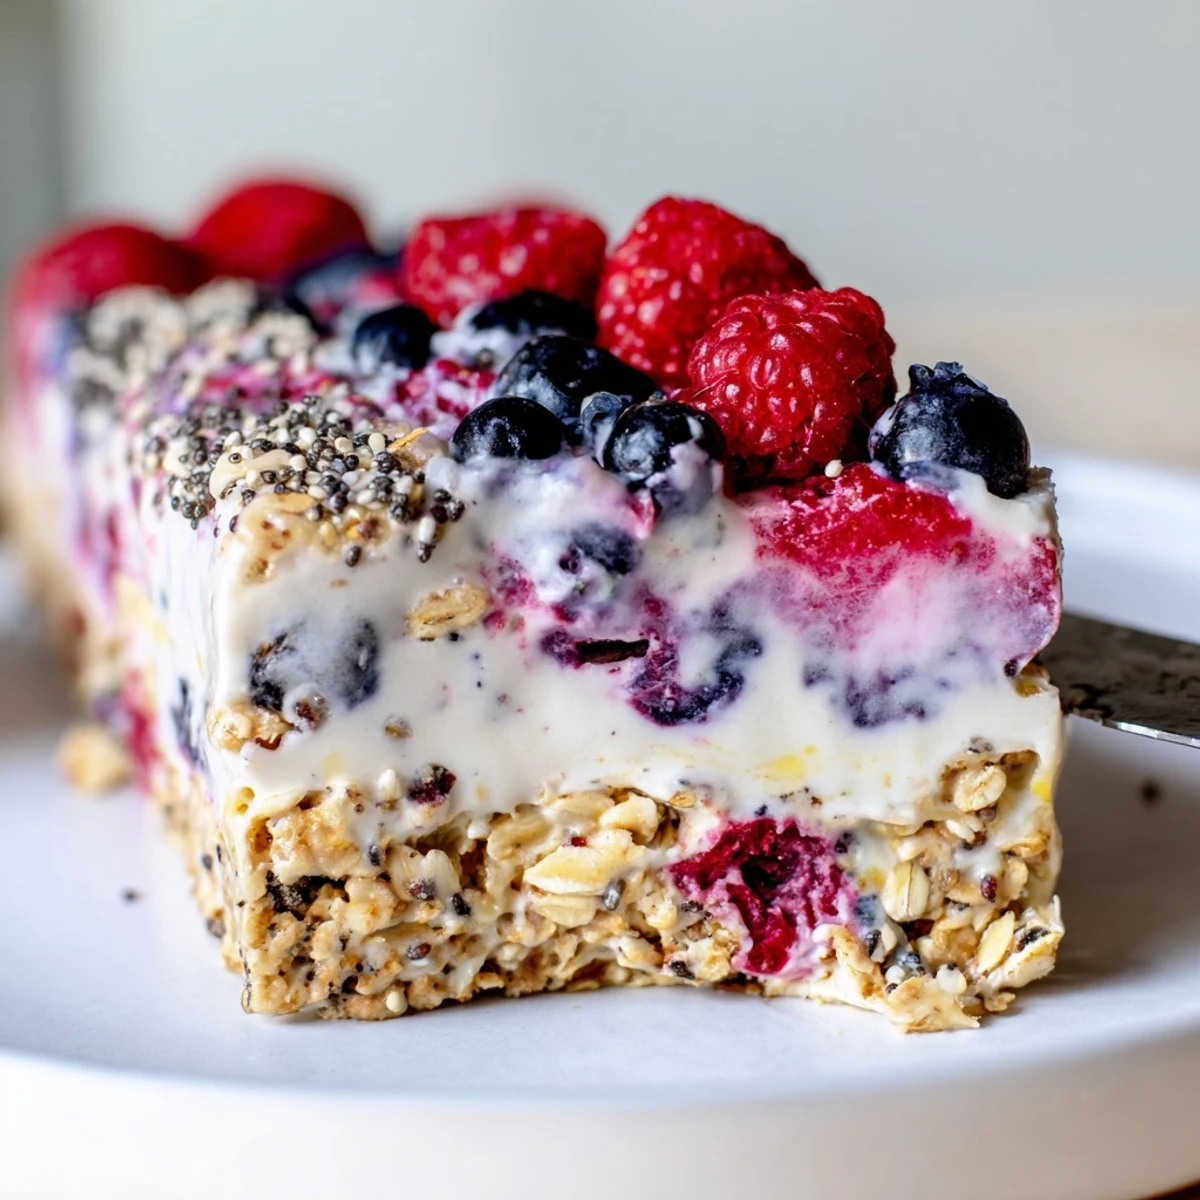
Save These cool, creamy bars combine smooth Greek yogurt with sweet mixed berries and a crunchy granola base for the perfect refreshing treat. Simply layer the ingredients, freeze until firm, and slice into portable bars. They're ideal for busy mornings, afternoon snacks, or healthy dessert cravings.
The combination of protein-rich yogurt, antioxidant-packed berries, and fiber-filled granola keeps you satisfied while the frozen texture makes them feel indulgent. Plus, the no-bake method means minimal effort and maximum flavor.
My youngest daughter discovered she could make these bars completely by herself last summer, and I kid you not, she started making double batches every Sunday. The pride on her face when she pulls them from the freezer never gets old, and honestly, having a healthy snack ready to grab has been a game-changer for our busy afternoons.
Last summer our AC broke during a heatwave, and nobody wanted to turn on the oven. I experimented with freezing layers instead of baking them, and somehow we stumbled upon something better than the baked version. Now even when the oven works, we still make these the no-bake way.
Ingredients
- 2 cups granola: Low-sugar varieties work best here because the honey adds sweetness. If your granola has large clusters, break them up slightly for a more even base.
- 2 tbsp honey or maple syrup: This acts as the glue holding your granola layer together. Warm honey for 10 seconds in the microwave if it is too thick to pour.
- 2 tbsp melted coconut oil: Make sure it is completely melted but not hot, or it might make your granola soggy instead of crisp.
- 2 cups plain Greek yogurt: Full-fat Greek yogurt creates the creamiest layer that holds up beautifully when frozen. Dairy-free alternatives work but may soften faster.
- 2–3 tbsp honey or agave syrup: Start with less and taste your yogurt mixture. Berries vary in sweetness, so adjust accordingly.
- 1 tsp pure vanilla extract: Do not skip this. It is what makes the yogurt layer taste like actual dessert rather than breakfast.
- 1 cup mixed fresh berries: Blueberries and raspberries hold their shape best. If using strawberries, slice them thin so they do not create uneven frozen pockets.
- 1 tbsp chia seeds: These add a tiny crunch and boost the nutrition, but the bars turn out fine without them if you are not a fan.
Instructions
- Prep your pan like a pro:
- Line an 8x8-inch baking pan with parchment paper, letting the paper hang over two opposite sides. These flaps become your handles later when lifting the frozen slab out.
- Make the granola base:
- Mix granola, honey, and melted coconut oil in a medium bowl until every piece is coated. Press it firmly into your prepared pan using the back of a spoon or the bottom of a measuring cup to compact it evenly.
- Whip up the creamy layer:
- In a separate bowl, blend Greek yogurt, honey, and vanilla until completely smooth. Taste and adjust sweetness before spreading.
- Layer it up:
- Pour the yogurt mixture over the granola base and spread it gently with an offset spatula or the back of a spoon. Scatter berries across the top, then sprinkle chia seeds if you are using them.
- Freeze until firm:
- Freeze for at least 4 hours. I usually make these the night before so they are ready by morning.
- Slice and serve:
- Lift the slab from the pan using the parchment overhang. Let it sit for 5 to 10 minutes on a cutting board before slicing with a sharp knife. Store bars in an airtight container in the freezer.
 Save
Save My neighbor mentioned she started hiding these in the back of her freezer because her husband kept eating them before the kids got home from school. Apparently adults love them just as much as children do.
Making Ahead
I keep a batch in the freezer at all times during summer months. They last for months but honestly never survive more than a week at my house. Having a homemade snack ready eliminates so much stress during busy weeks.
Customization Ideas
Swap berries for sliced peaches or mangos when stone fruits are in season. Sometimes I add a layer of peanut butter between the granola and yogurt for extra protein that keeps everyone full longer.
Storage and Serving
These bars travel surprisingly well to picnics and beach days if packed in an insulated bag with ice packs. They soften but do not turn into mush like ice cream treats.
- Wrap individual bars in parchment paper for quick grab-and-go portions
- Let thaw for 3 to 5 minutes for the best texture
- Refreeze any leftovers within 30 minutes for optimal freshness
 Save
Save These bars started as a summer desperation experiment and became a year-round staple. Sometimes the best recipes come from saying what if instead of following directions.
Recipe FAQs
- → How long do these bars need to freeze?
-
Freeze for at least 4 hours until completely firm. For best results, freeze overnight to ensure clean slices and easy handling.
- → Can I use different fruits?
-
Absolutely. Swap mixed berries for sliced strawberries, diced mango, peaches, or any fruit you enjoy. Just keep the total amount around 1 cup for even distribution.
- → How should I store these bars?
-
Keep in an airtight container in the freezer for up to 2 months. Separate layers with parchment paper to prevent sticking. Serve frozen or let thaw 5-10 minutes for a softer texture.
- → Can I make these dairy-free?
-
Yes. Use coconut yogurt, almond yogurt, or your favorite dairy-free alternative. The texture and freezing time remain similar, though coconut yogurt adds a subtle tropical flavor.
- → Why do my bars crumble when cutting?
-
Let the frozen slab sit at room temperature for 5-10 minutes before slicing. Use a sharp knife and press straight down rather than sawing back and forth for clean edges.
- → Can I reduce the sugar content?
-
Certainly. Omit the honey in the yogurt layer or use a low-calorie sweetener like stevia or monk fruit. Choose unsweetened granola and rely on the berries for natural sweetness.
