 Save
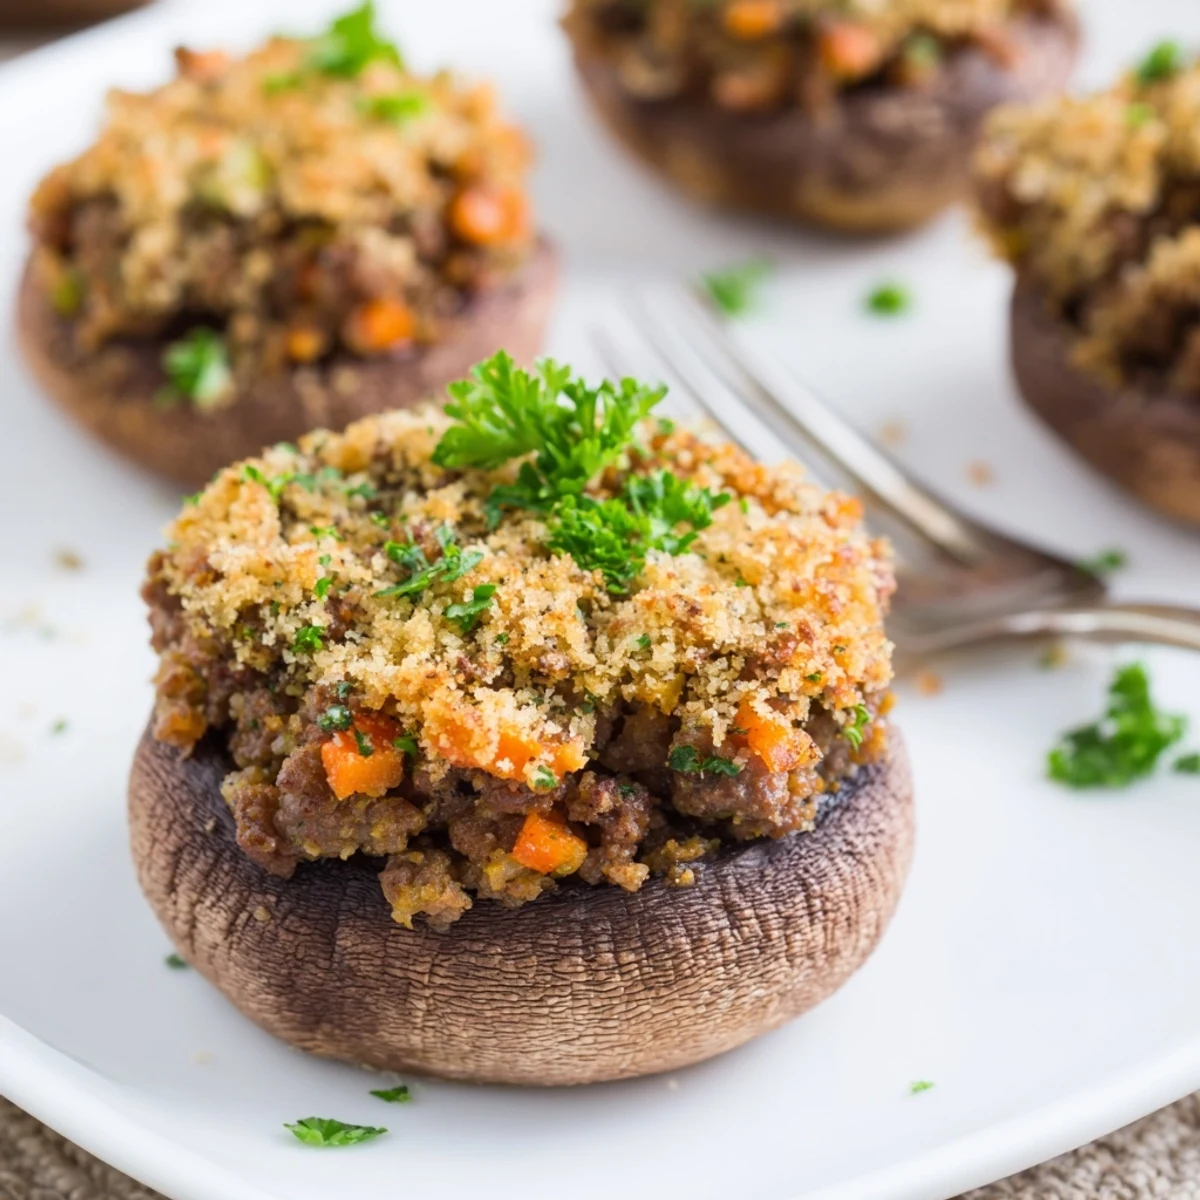
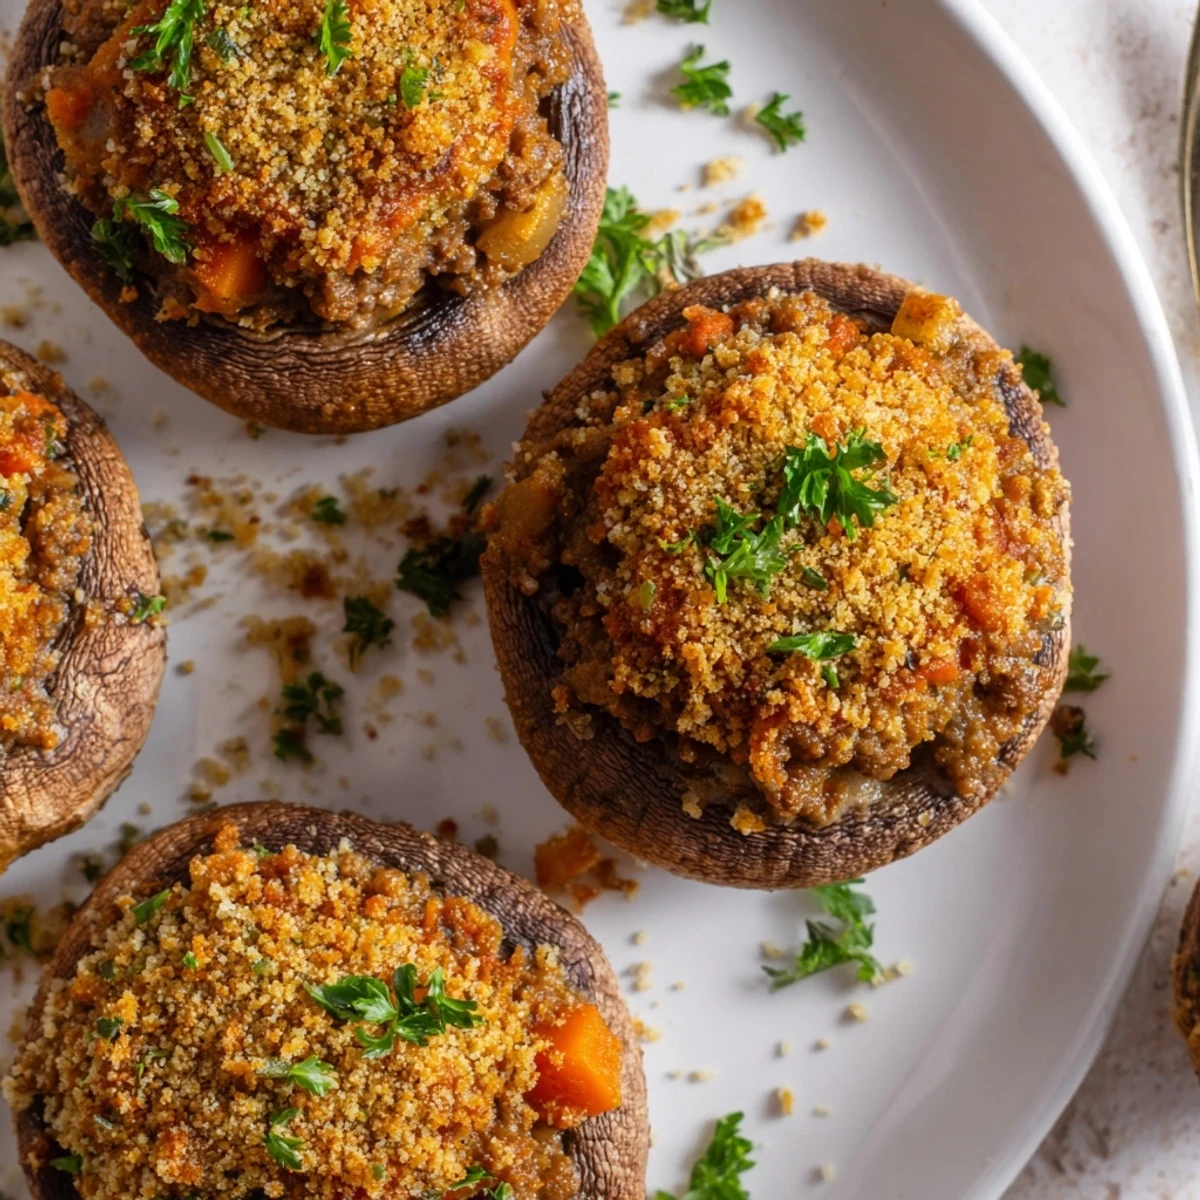
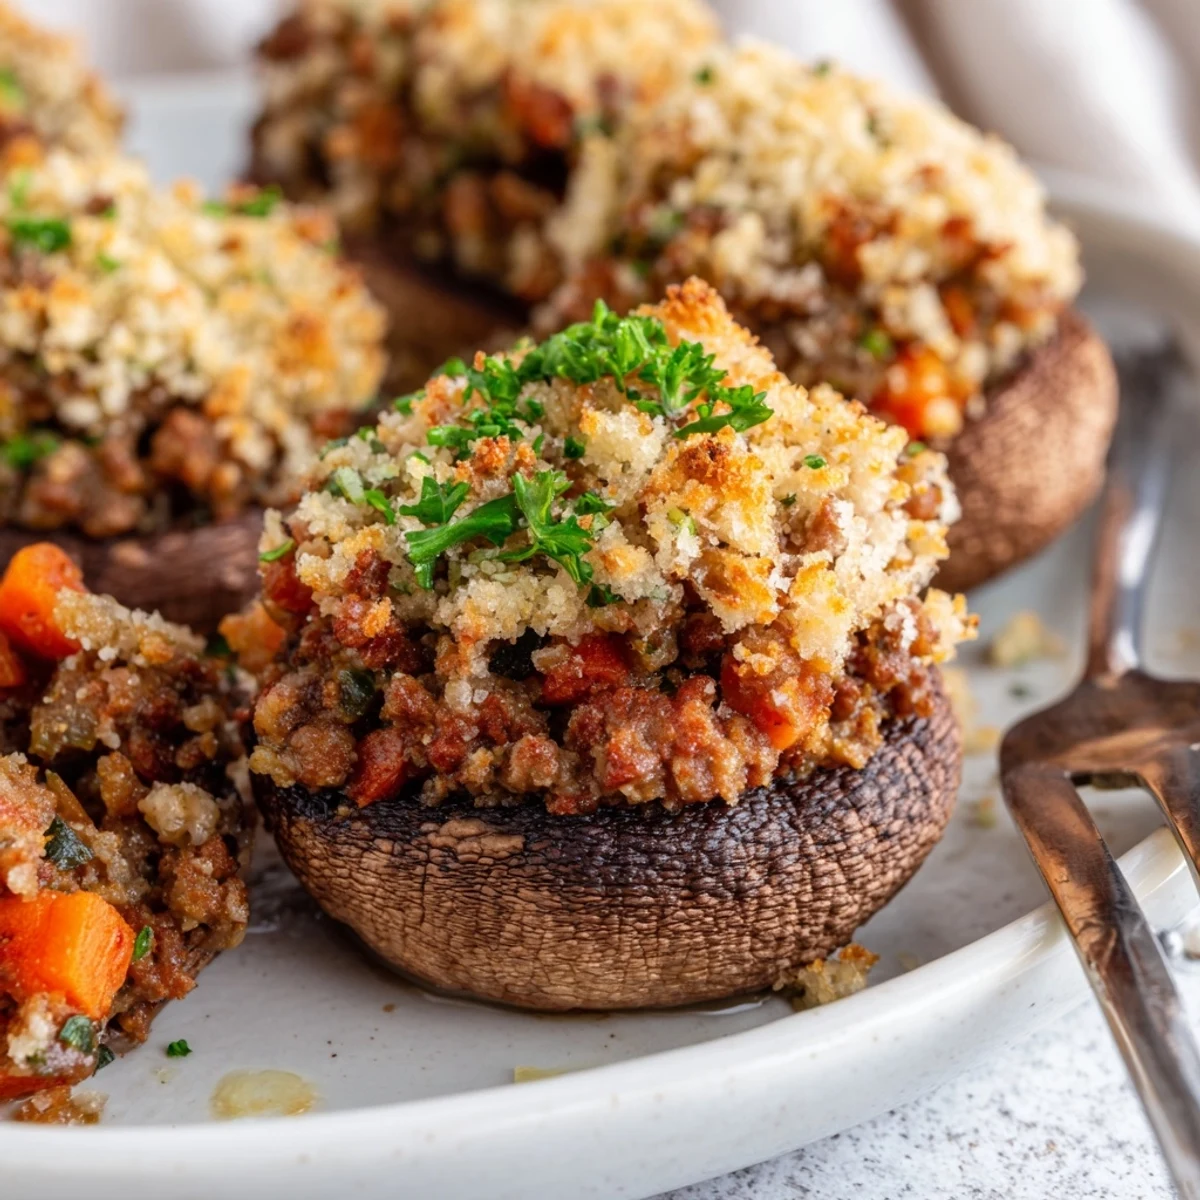
Save These stuffed mushrooms feature large portobello caps filled with a savory mixture of lean ground beef, aromatic vegetables, and herbs. The filling combines chopped mushroom stems, onion, garlic, carrot, and celery with browned beef seasoned with tomato paste, oregano, thyme, and Worcestershire sauce. A golden topping of fresh breadcrumbs and parsley adds delightful crunch. Ready in under an hour, these make impressive appetizers or satisfying snacks. The mushrooms bake until tender while the filling becomes rich and flavorful.
The first time I made these stuffed mushrooms was for a last-minute dinner party when I realized I had more guests than planned. I grabbed whatever was in the fridge and ended up with these beauties that everyone kept asking about. Now they are my go-to when I want something impressive but secretly stress-free.
Last autumn my sister came over and we stood in the kitchen talking while chopping vegetables and filling mushrooms. She kept stealing bits of the filling as we worked and by the time they came out of the oven, half was already gone from the pan.
Ingredients
- 8 large portobello mushrooms: These sturdy caps hold up perfectly during baking and provide a meaty base for the filling
- Olive oil: Use a good quality one here since it adds subtle flavor to both the filling and the crispy topping
- Onion and garlic: The aromatic foundation that makes your kitchen smell amazing while everything cooks
- Reserved mushroom stems: Never throw these away, chopping them finely adds more mushroom flavor and reduces waste
- Lean ground beef: Provides richness and substance while keeping the filling from becoming too greasy
- Carrot and celery: These classic aromatics add sweetness and depth to the savory mince mixture
- Tomato paste: Concentrated umami that deepens the color and flavor of the filling
- Dried oregano and thyme: Earthy herbs that complement beef beautifully without overpowering it
- Worcestershire sauce: The secret ingredient that adds that irresistible savory depth everyone notices but cannot identify
- Beef stock: Helps bind the filling together while adding another layer of meaty flavor
- Fresh breadcrumbs: Create that golden, crunchy topping that contrasts perfectly with the tender mushrooms
- Fresh parsley: Adds brightness and a pop of color that makes these look as good as they taste
Instructions
- Get your oven ready:
- Preheat to 200°C (400°F) and line a baking tray with parchment paper so nothing sticks and cleanup becomes effortless
- Prep the mushrooms:
- Wipe them clean with a damp cloth, twist off the stems, and place the caps gill side up on your prepared tray like little empty boats waiting to be filled
- Build the flavor base:
- Heat olive oil in a large skillet over medium heat, add onion and garlic, and let them soften for about 2 minutes until your kitchen starts smelling wonderful
- Add the vegetables:
- Stir in those chopped mushroom stems along with diced carrot and celery, then cook for 3 to 4 minutes until everything has softened and started to release their aromas
- Brown the beef:
- Add the ground beef to the skillet, breaking it up with your spoon as it cooks until no pink remains and it has developed nice browned bits, about 5 minutes
- Create the savory filling:
- Stir in tomato paste, oregano, thyme, Worcestershire sauce, and beef stock, then let everything simmer for 3 to 4 minutes until the mixture thickens into something you want to eat with a spoon
- Fill the caps:
- Spoon that gorgeous mince mixture into each mushroom cap, pressing gently but not packing it too tight so the mushrooms still have room to breathe
- Add the crispy topping:
- Mix fresh breadcrumbs, chopped parsley, and a tablespoon of olive oil in a small bowl until combined, then sprinkle this mixture generously over each stuffed mushroom
- Bake to golden perfection:
- Slide the tray into the oven for 20 to 25 minutes until the mushrooms are tender and that breadcrumb topping has turned a beautiful golden brown
- Serve and enjoy:
- Let them cool for just a few minutes so nobody burns their tongue, then serve warm with extra parsley sprinkled on top if you want them to look even more impressive
 Save
Save My dad always requests these whenever he visits and tells everyone about my mushroom recipe like he discovered it himself. Watching people get excited about mushrooms never gets old.
Choosing the Best Mushrooms
I learned to look for caps that are flat and evenly sized so they cook at the same rate. Avoid any that look slimy or have dark spots since those are past their prime. Give them a gentle squeeze and they should feel firm and springy, not soft or mushy.
Make-Ahead Magic
You can prepare the filling a day ahead and keep it refrigerated until you are ready to stuff and bake. Sometimes I even fill the mushrooms in the morning and keep them covered in the fridge, then just pop them in the oven when guests arrive.
Serving Suggestions
These work beautifully as appetizers but I have also served them as a light main with a simple green salad on the side. They pair wonderfully with a crisp white wine or even a light red if you prefer.
- Try swapping beef for turkey if you want something lighter
- A sprinkle of parmesan on the topping takes them over the top
- Leftovers make an excellent quick lunch the next day
 Save
Save These stuffed mushrooms have become one of those recipes I can make without even thinking, yet they still make people happy every single time.
Recipe FAQs
- → What type of mushrooms work best?
-
Large portobello or flat mushrooms are ideal because their caps provide ample space for the generous filling and hold their shape well during baking.
- → Can I make these ahead of time?
-
Yes, prepare the filling and stuff the mushrooms up to a day in advance. refrigerate covered, then add the breadcrumb topping just before baking.
- → How do I know when they're done?
-
The mushrooms should feel tender when pierced with a fork, and the breadcrumb topping should be golden brown and crisp, typically after 20-25 minutes at 200°C.
- → Can I freeze stuffed mushrooms?
-
Assemble and freeze unbaked for up to 3 months. Thaw overnight in the refrigerator, then bake as directed, adding a few extra minutes if needed.
- → What can I serve with these?
-
Pair with a crisp green salad, garlic bread, or serve as part of an appetizer spread. They also work well alongside roasted vegetables or soups.
- → How do I make them gluten-free?
-
Use gluten-free breadcrumbs and ensure your Worcestershire sauce is certified gluten-free. The rest of the ingredients are naturally gluten-free.
